Create an automated test
- Getting Started
Create an automated test
Here we will learn how to Create an automated test
- Go to Test Manager -> Test Plans section
- Hint: to keep both Tabs Open, you can click Test Plans with the middle button on your mouse
- If you do not have a folder, you must create one before clicking the Add test plan button
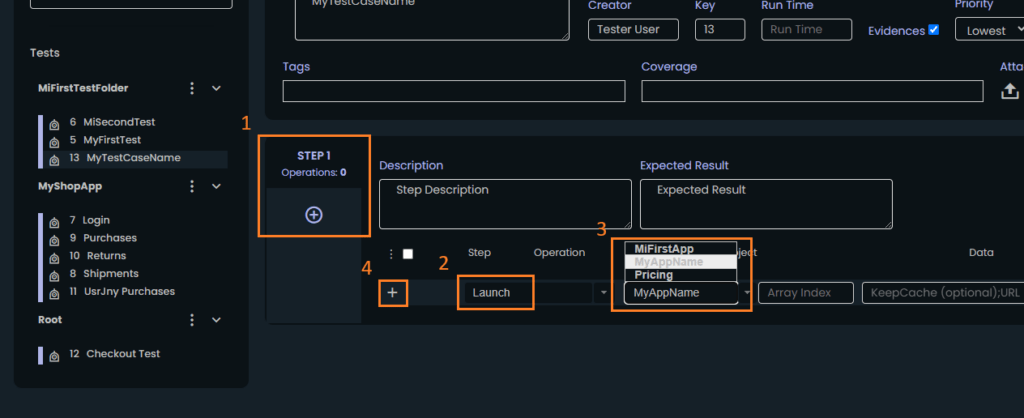
- Create a Test Case clicking on the three dots icon -> Create Test, filling the name and in Test Type select Automated. Click on Create

- Add a Test Step clicking in the icon "+"
- Select the "+" icon inner the test for create the operation
- In the drop-down menu select the Launch the operation
- In object select your application (choose the application you created before)
- After all steps, you can start to debug your test and record new Steps from there
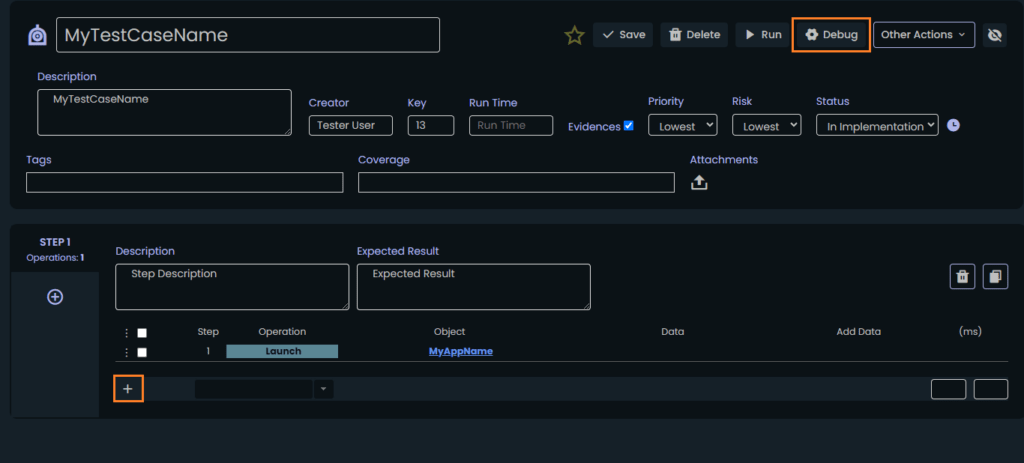
It is necessary to have the Runner running, with authentication and with the project selected to be able to enter Debug Mode
Next steps: Debug & Record Mode